A design using Concrete
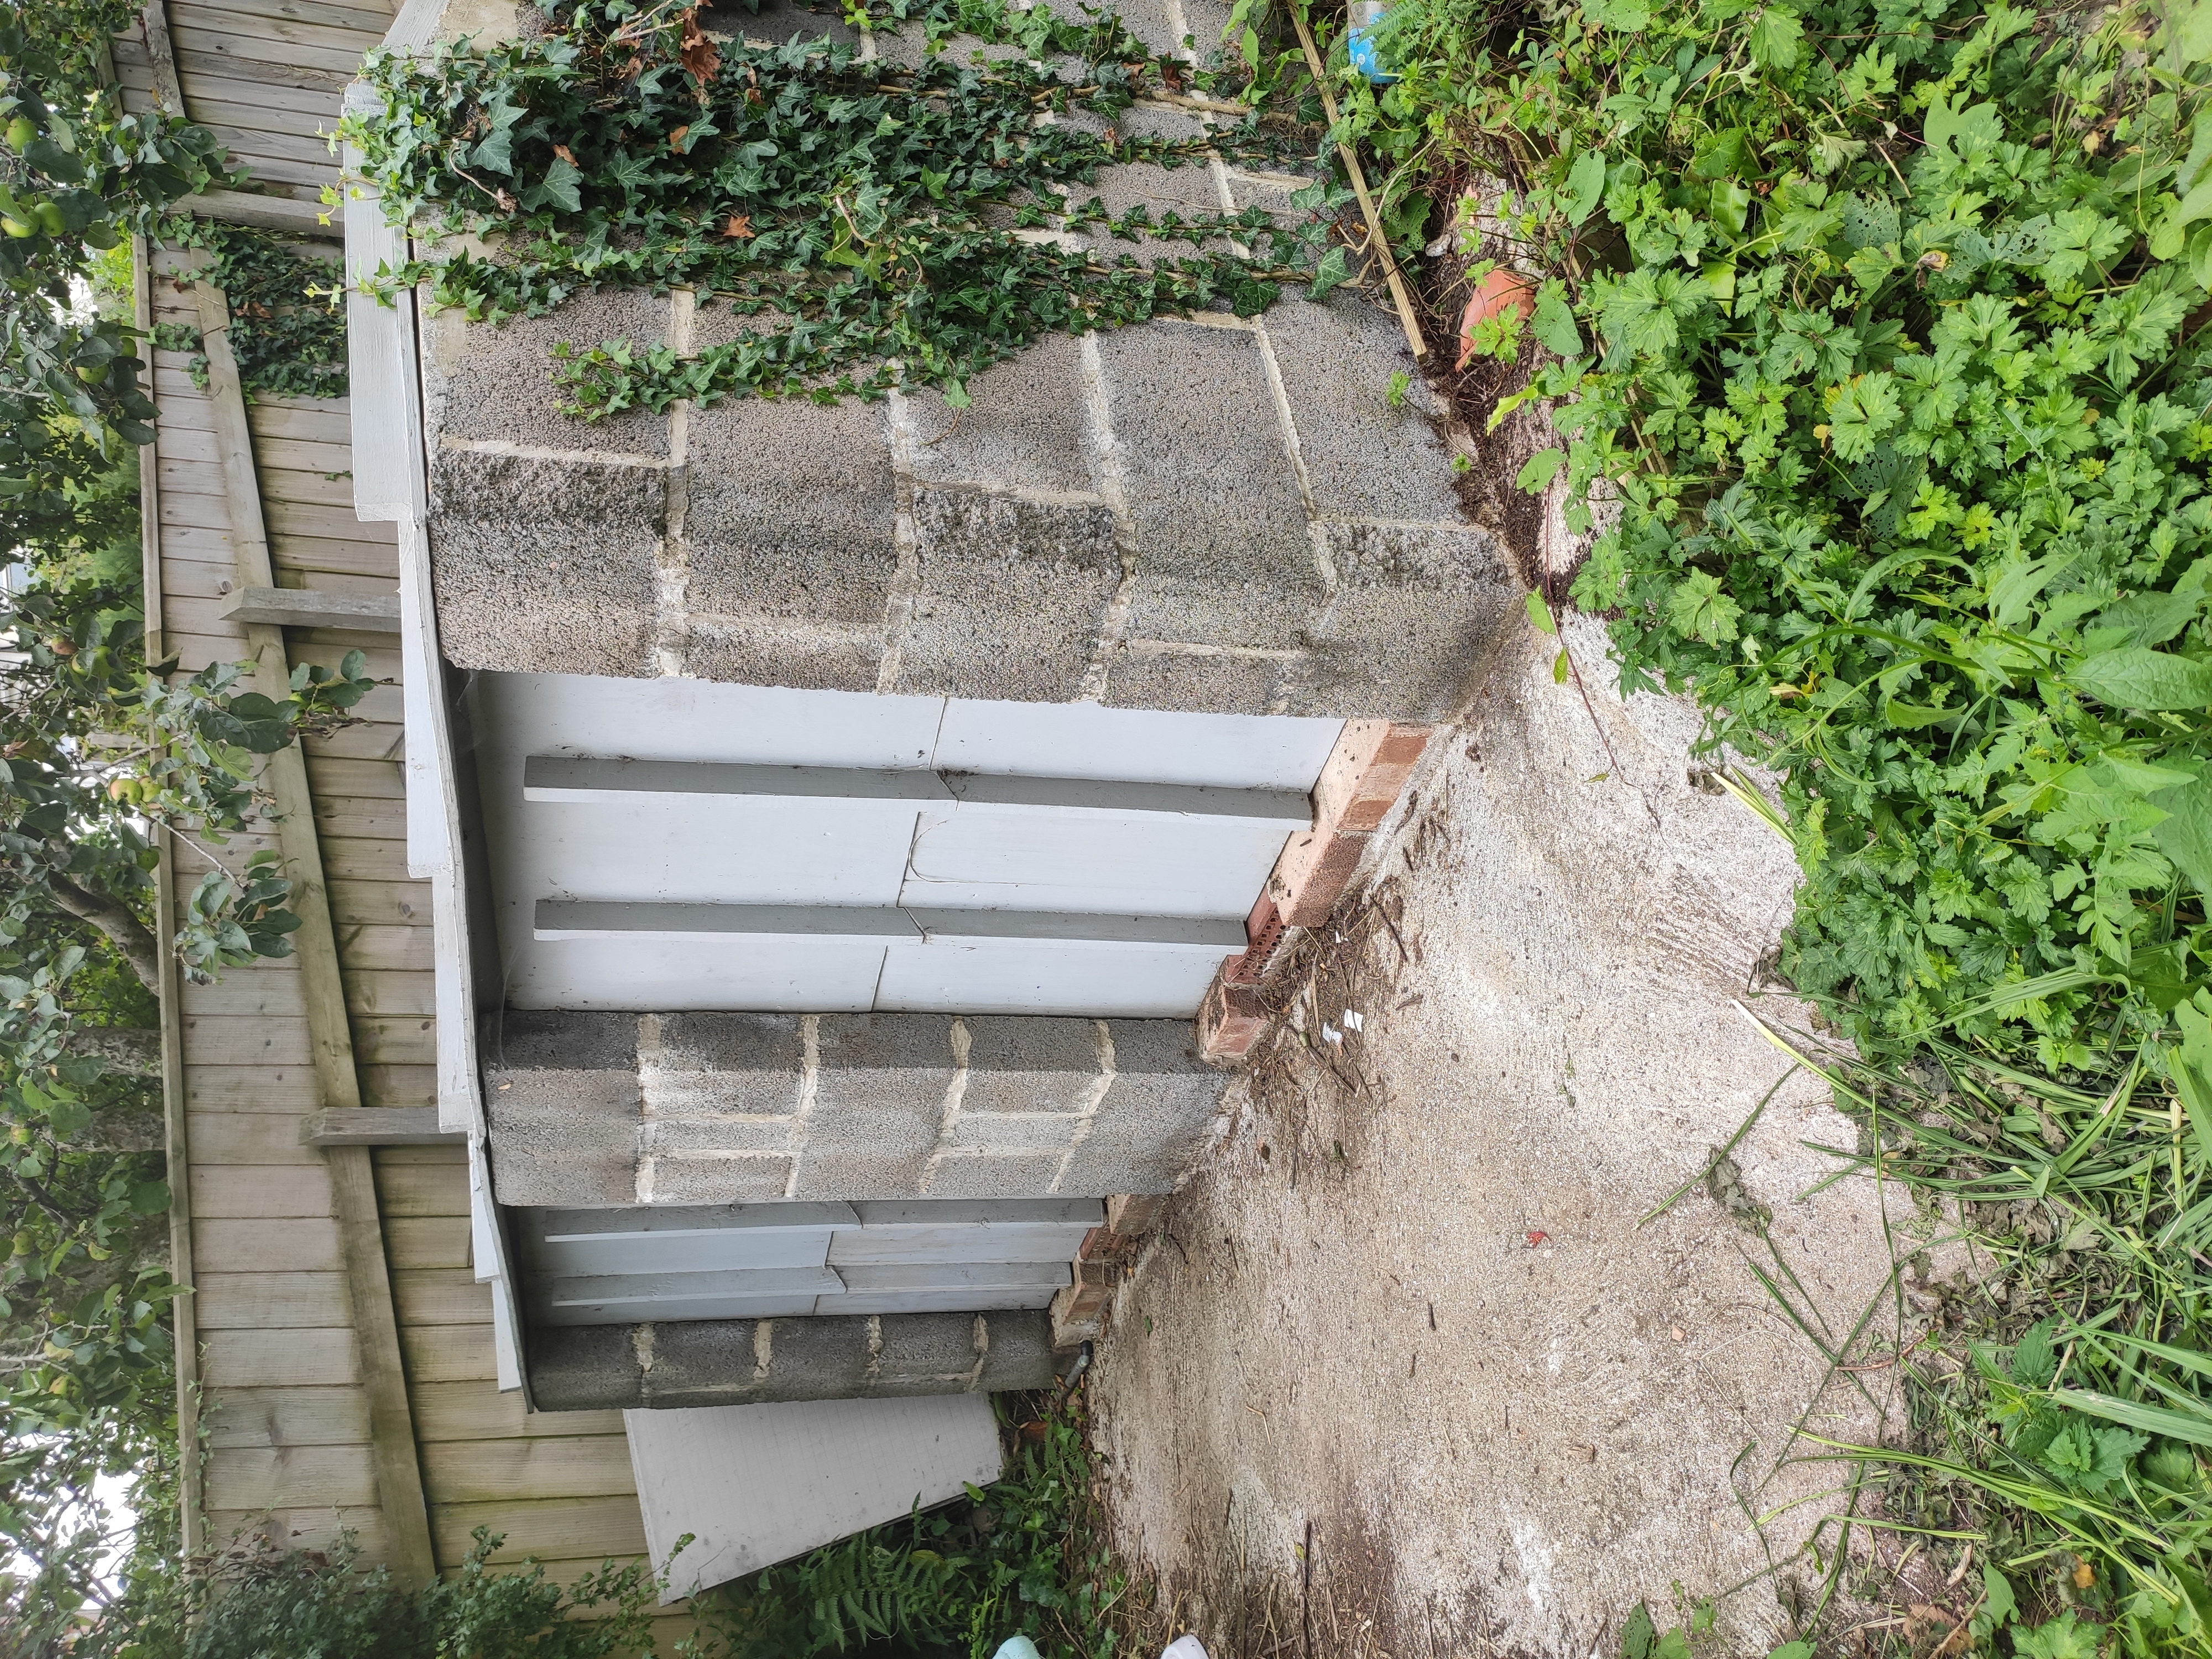
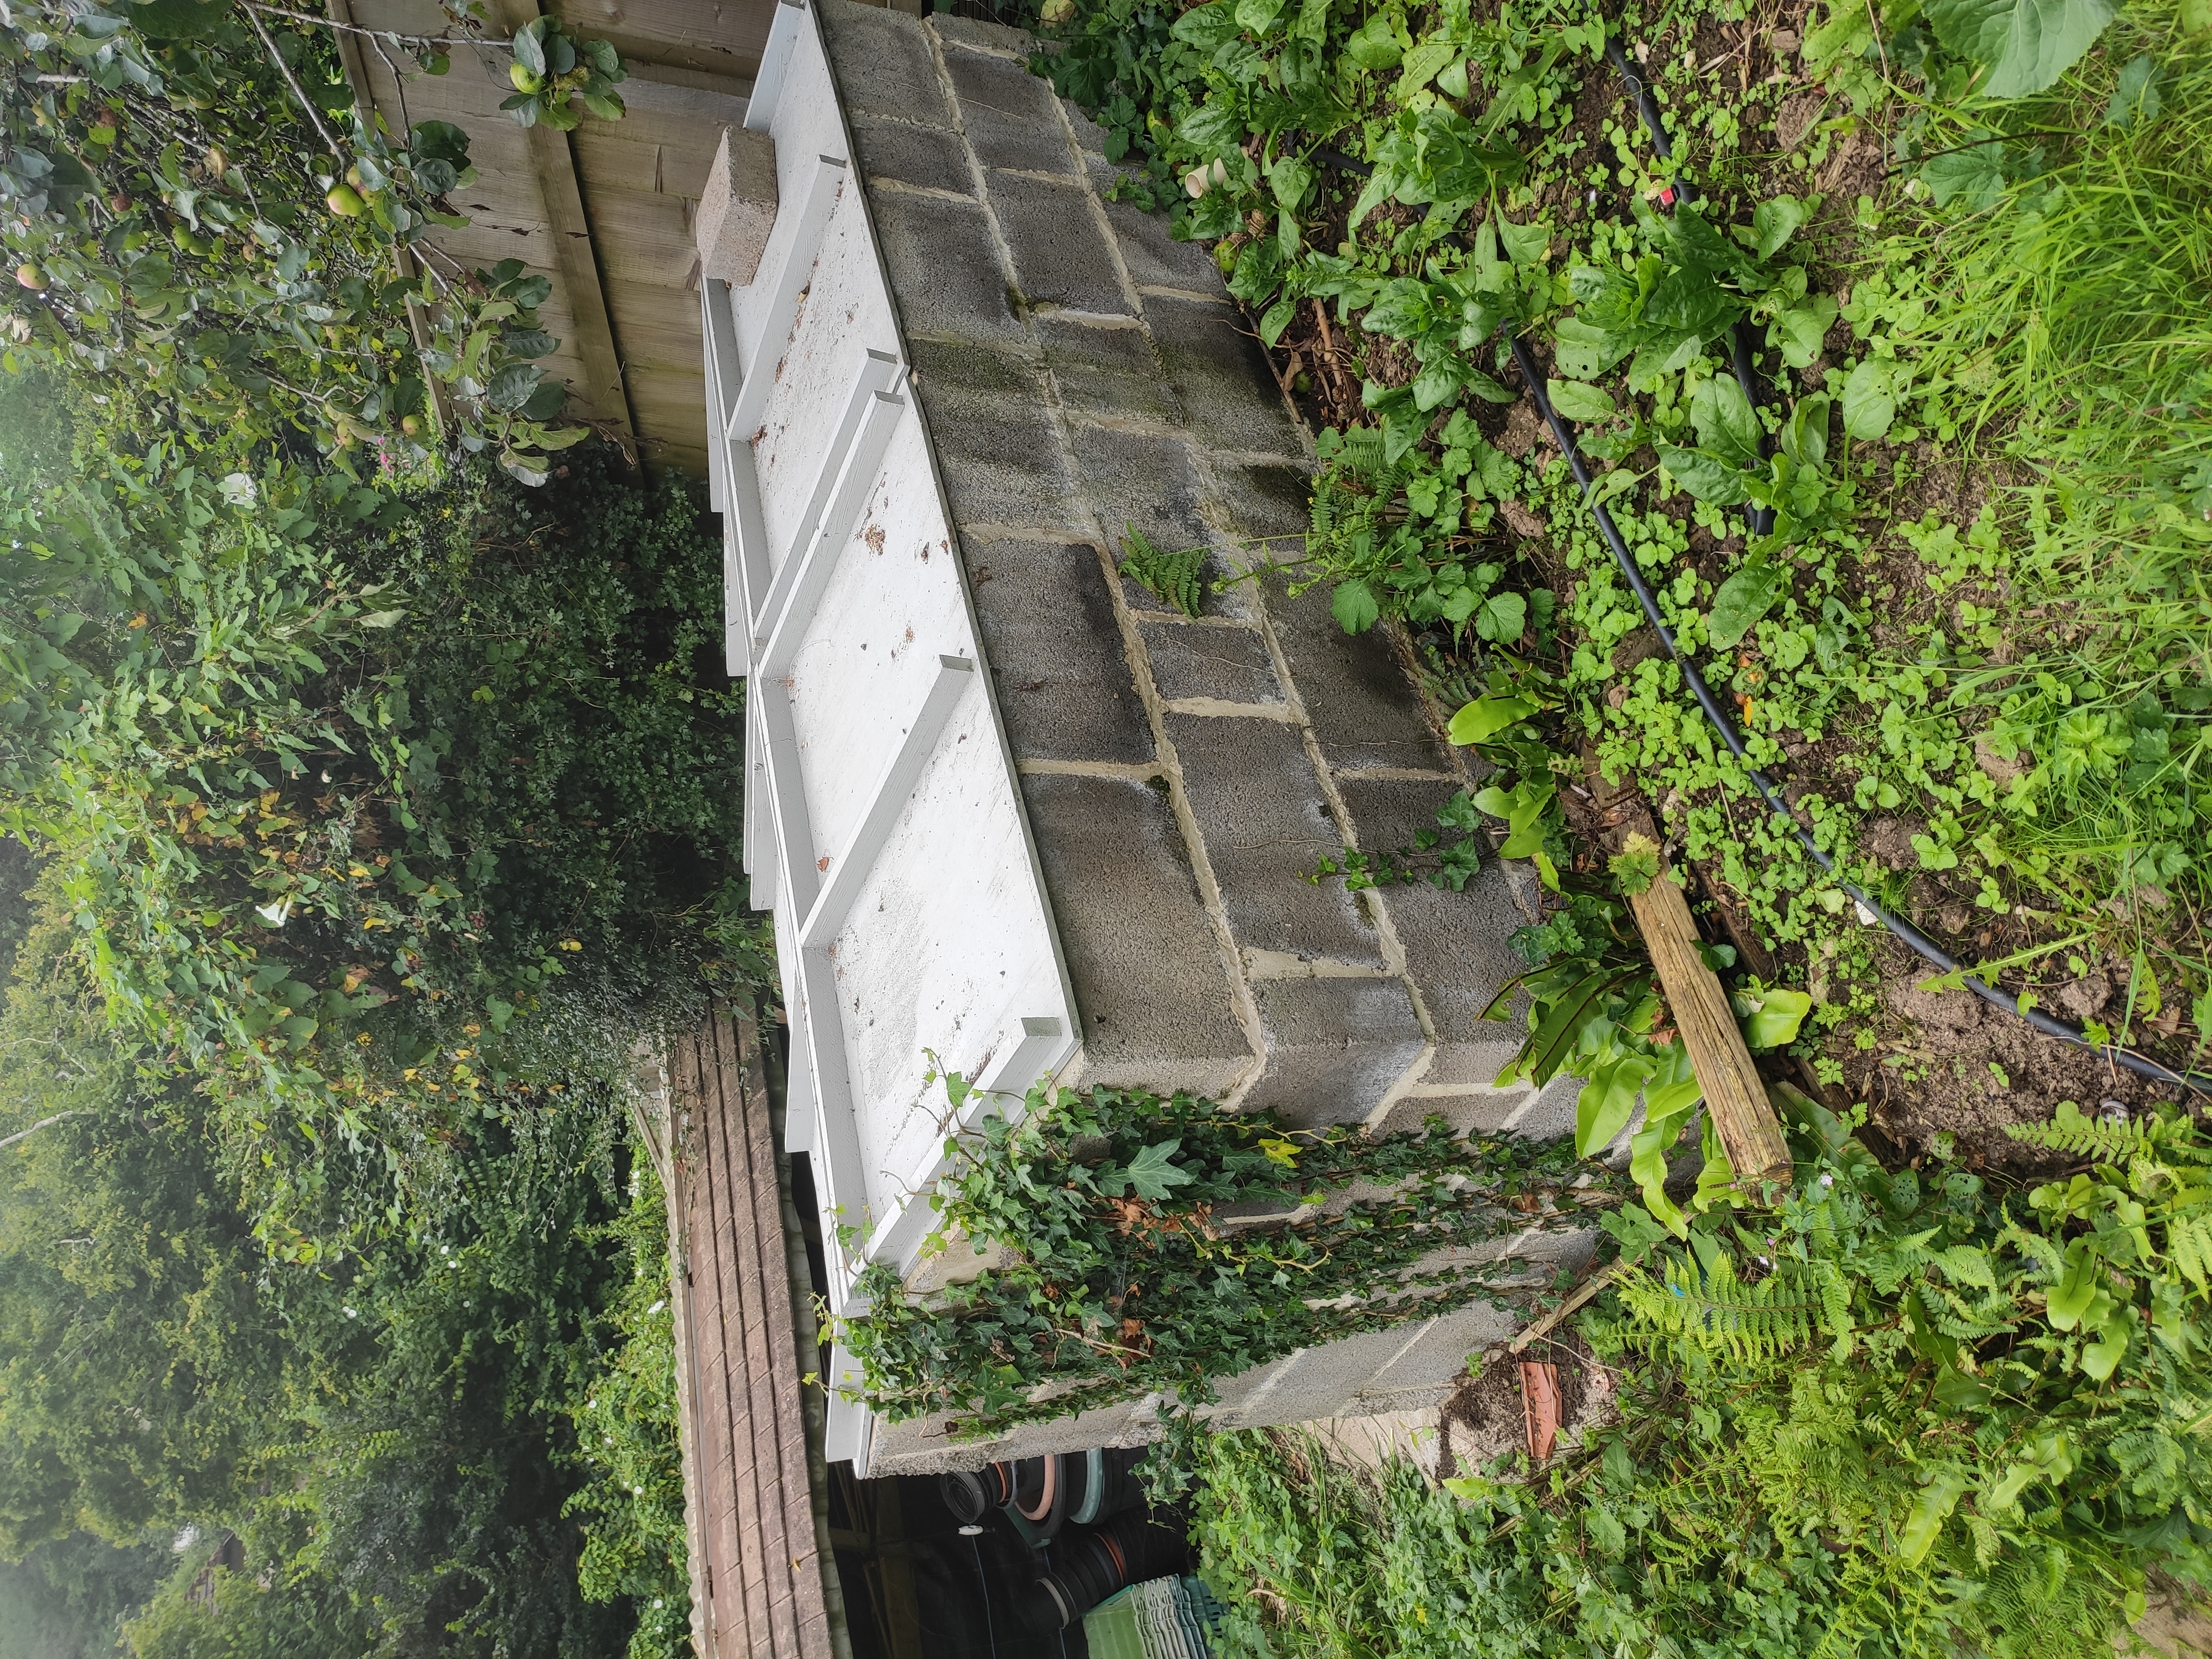
This was my first attempt at building a rat-proof compost heap. I admit, it’s not pretty, though the ivy growing up it will help that a lot. But it works very nicely. I get great compost, no rats, and lots of potent liquid plant food.
I think the IBC tank design is better – quicker, easier to make and just as effective, and it doesn’t have the high carbon cost of concrete. But this concrete setup should last forever, or close enough. And my garden is enclosed and only accessible through ordinary-sized doors. I wouldn’t have been able to get an IBC tank (or two) down here.
One downside of the concrete design is that the roof and doors might be tricky to design to last. I used plywood, as I had it to hand, and I also had a big pot of epoxy paint left over from a boat building job. I imagined that paint would be really tough and stand up to the conditions – sun, rain, and frost on the outside, heat, and high humidity on the inside. It’s lasted a few years, but I’ll need to replace the woodwork soon. I’ve just been given some cement boards – boards used as backer boards for tiling wet areas like showers. They should last a long time without maintenance, but they seem a little brittle. We'll see how that works out.
But anyway, the design captures the principles – no access for rats, the compost held above the floor allowing air underneath, and a system for collecting all the liquid that drips from the heaps. It’s also dark in there, so any germinating weed seeds soon die out and since the base of the heap is so well ventilated, air can pass right through the heap. There’s no need to turn it. The roof keeps the rain out – there’s no need to add water to the heap as it collects a little puddle of liquid underneath which has the incoming air passing over it. So it just stays damp, and no rain means no nutrients washed through. Just dump your weeds, vegetable scraps, and whatever else in there and leave it till it’s done.
I designed two bins, side by side, so when one’s full, I just leave it and start filling the other. Filling a bin takes me a few months. In the meantime, the heap in the first bin is decomposing. By the time the second bin is full, it’s time to open the first bin and empty it. It might go onto raised beds for the vegetables, around fruit trees and bushes, or I might shovel it through a hole I built in the side of my greenhouse, to be stored there and used for potting.
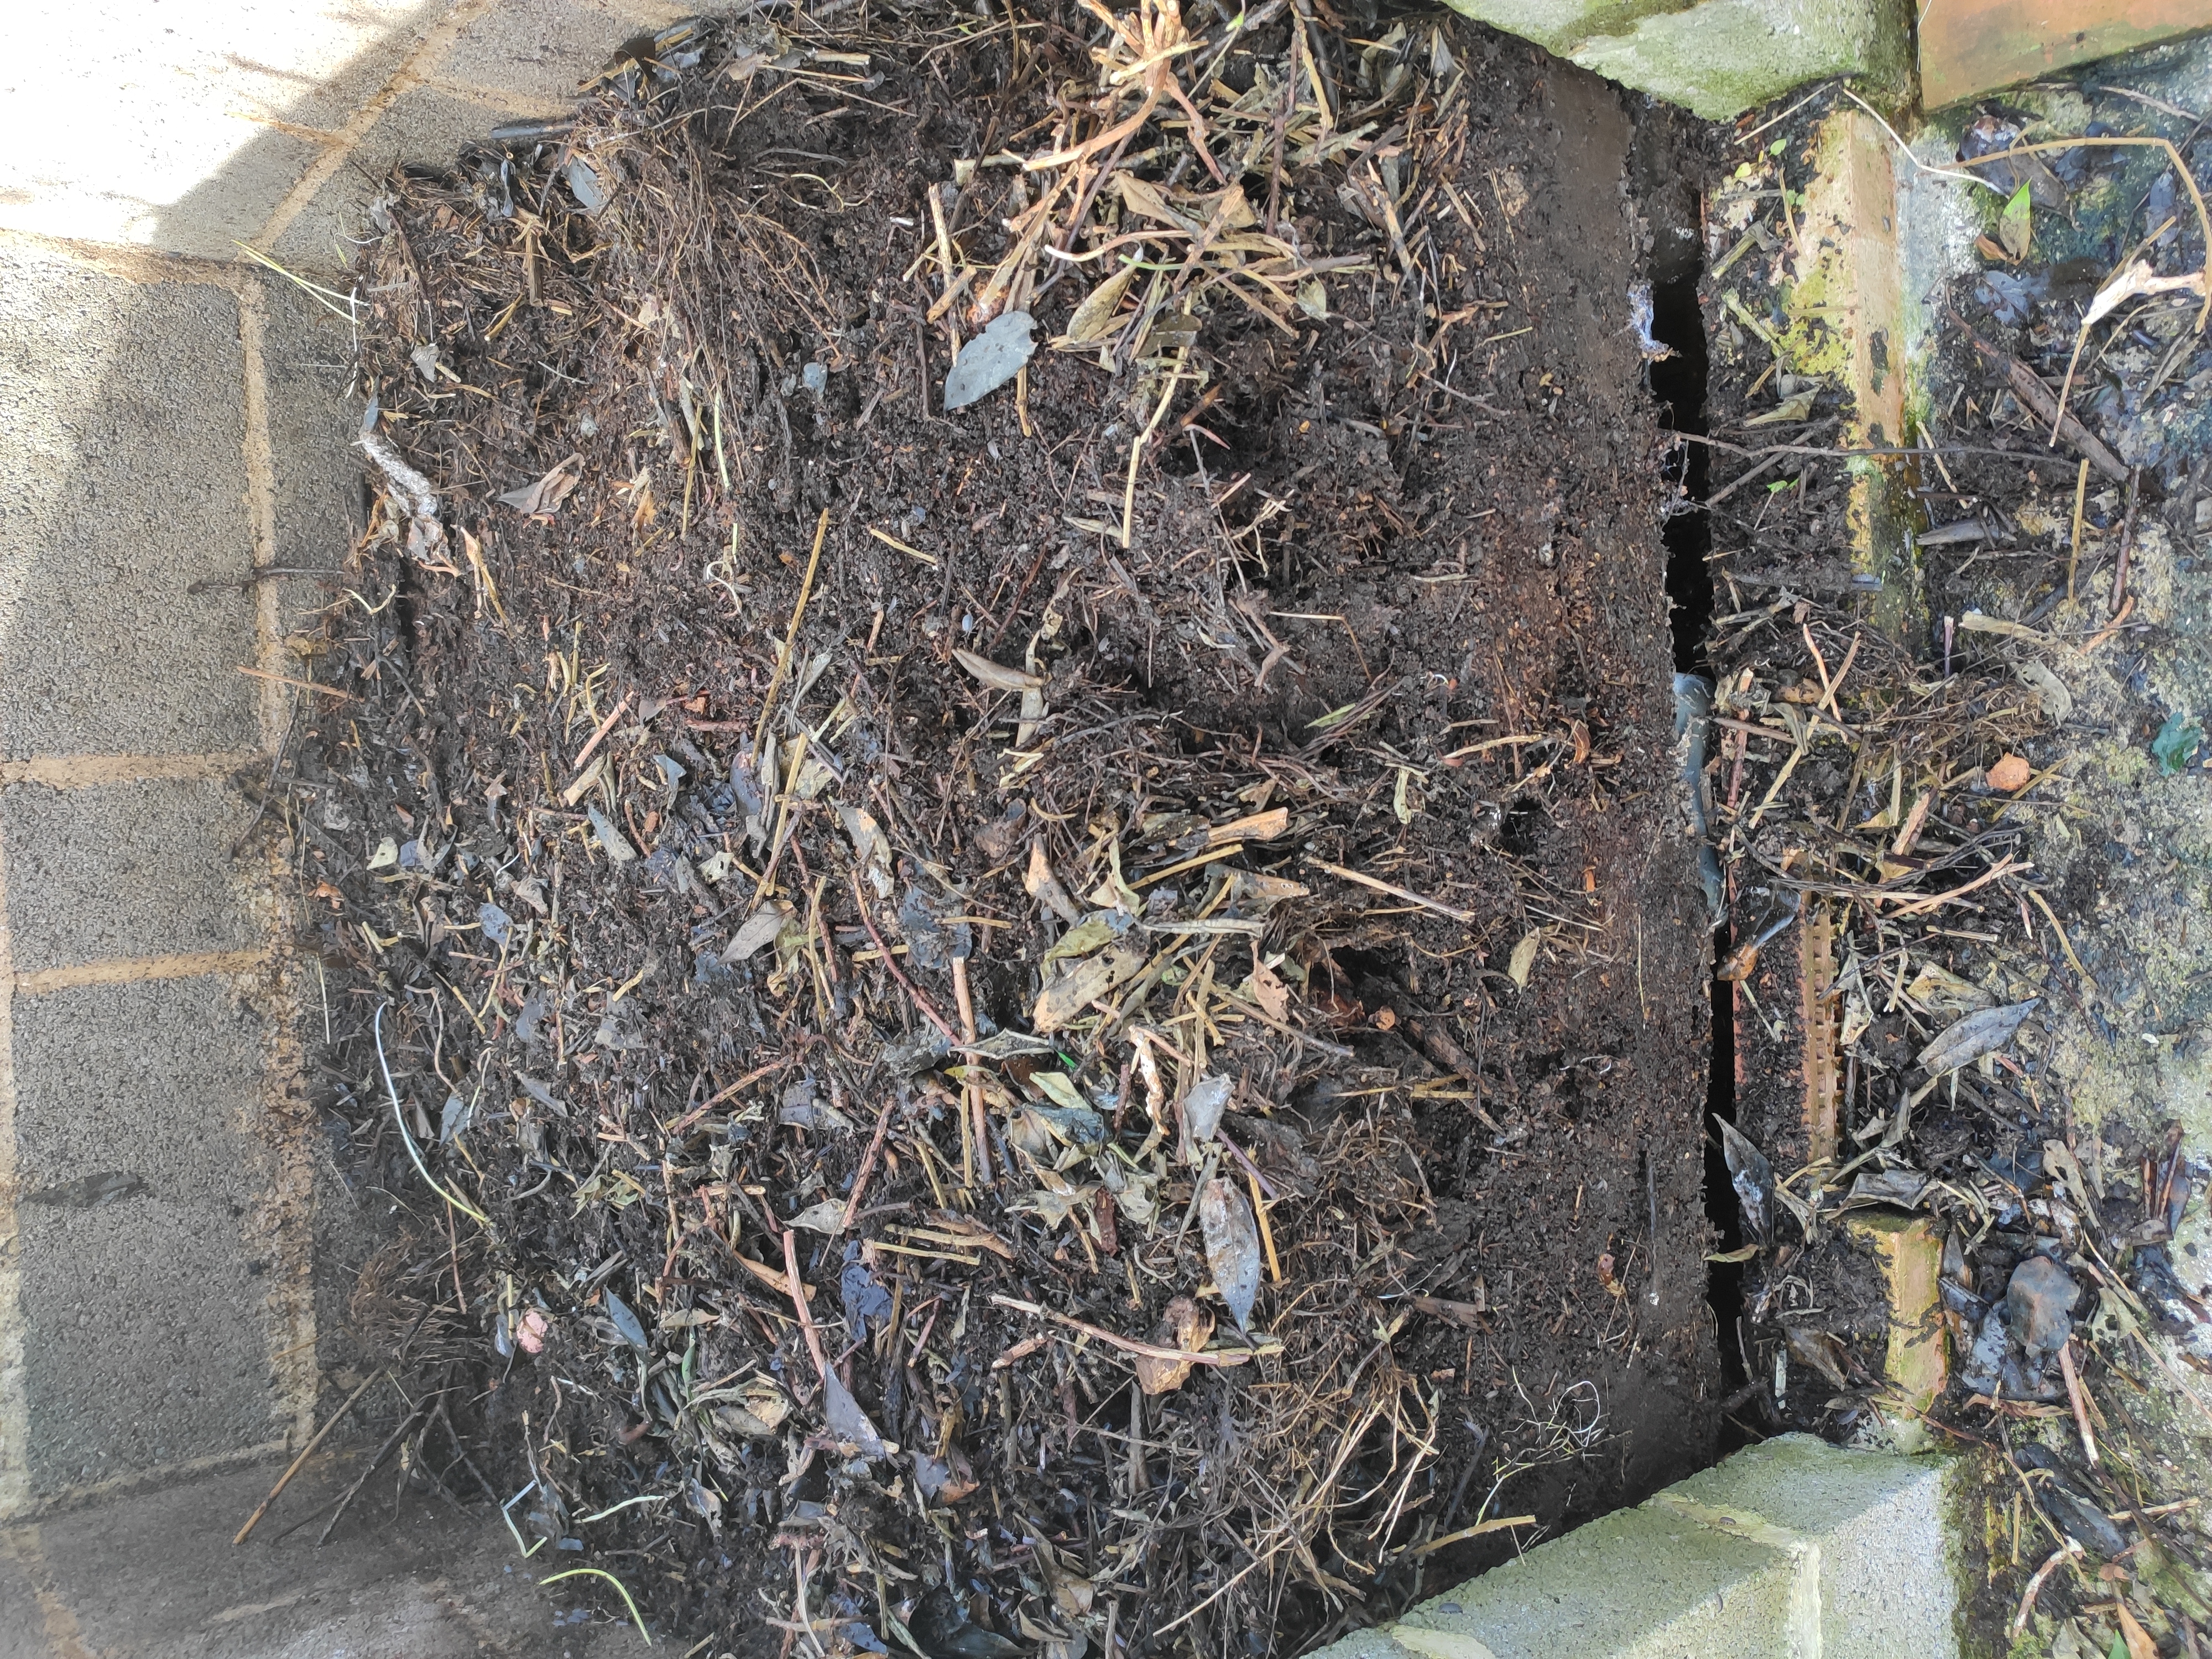
Here's a bin ready for emptying. It was full to the brim when I closed the lid. It shrinks down to 1/2 to 1/3 of the volume. But nothing is lost. The heap has lost structure and collapsed in on itself, and all the liquid that is a result of the decomposition is collected.
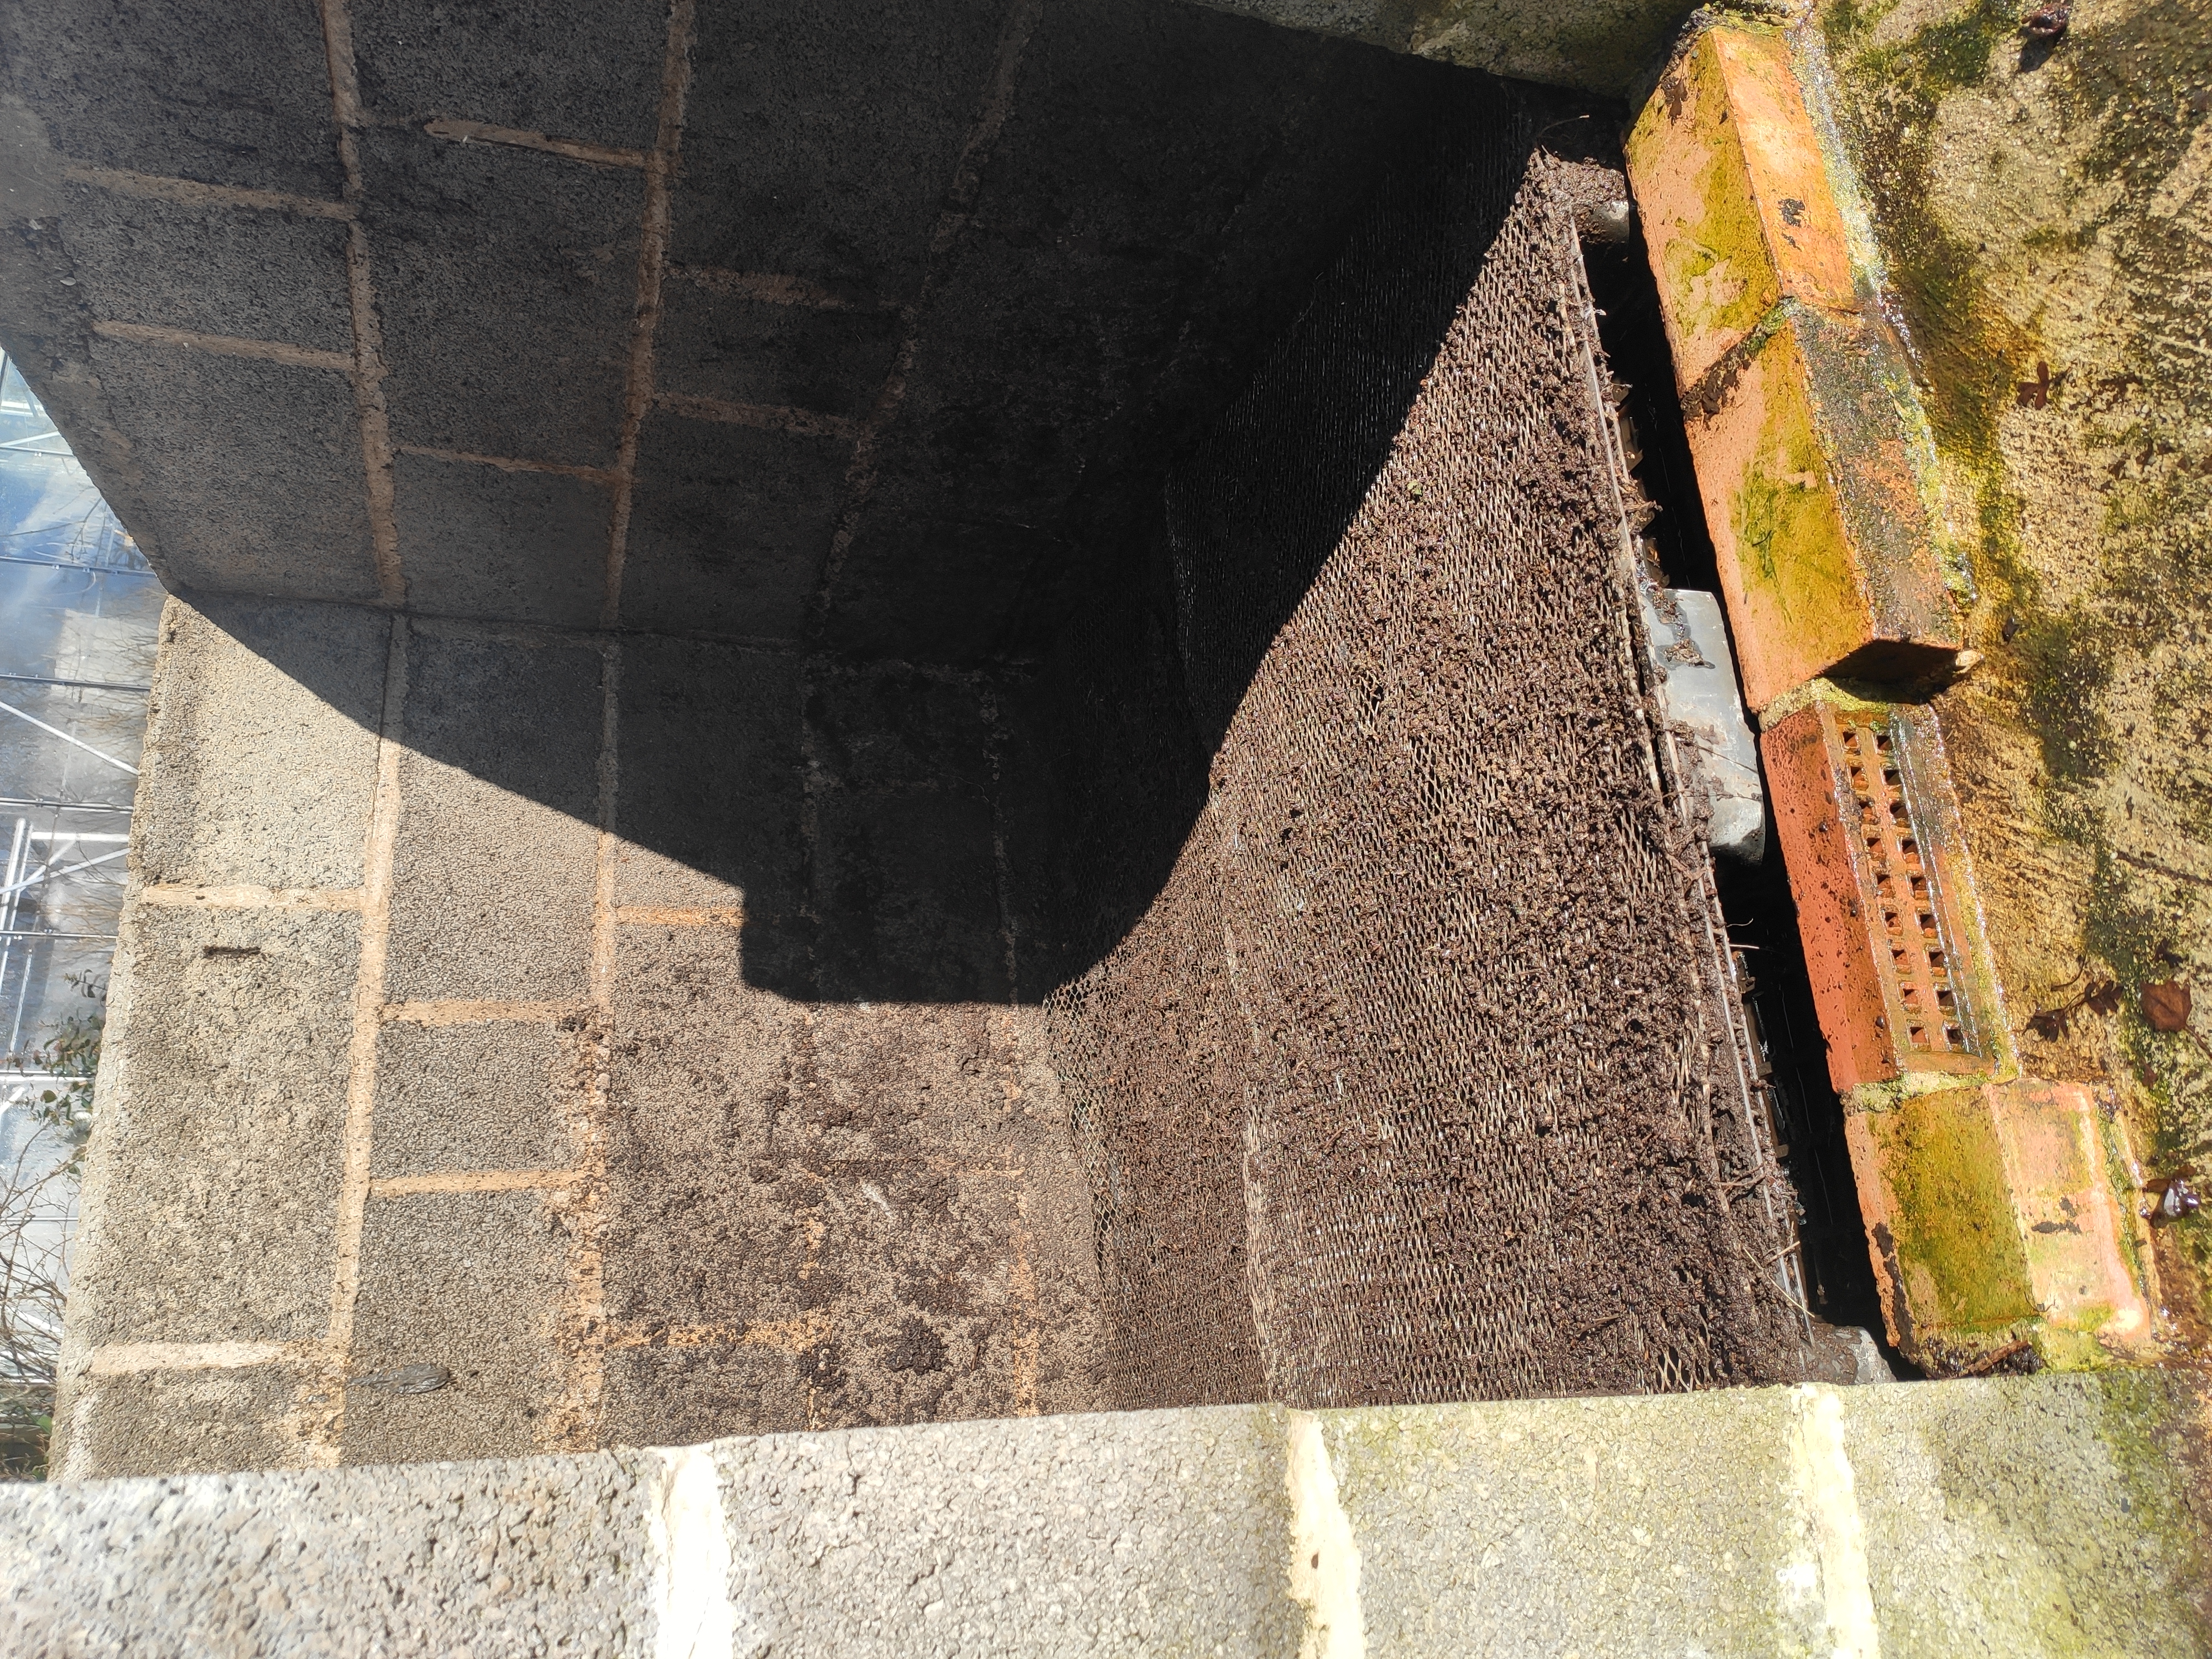
Here's the bin emptied. You can just make out the sheet of mesh laid on top of the pallet.
So to build it:
You need:
- Aggregate for making concrete.
- Sand for making mortar.
- Bags of cement.
- Blocks.
- Plywood, cement board, or aluminum sheeting to make the front hatches and roof.
- Two plastic pallets.
- Some stainless steel mesh to lay on top of the pallets.
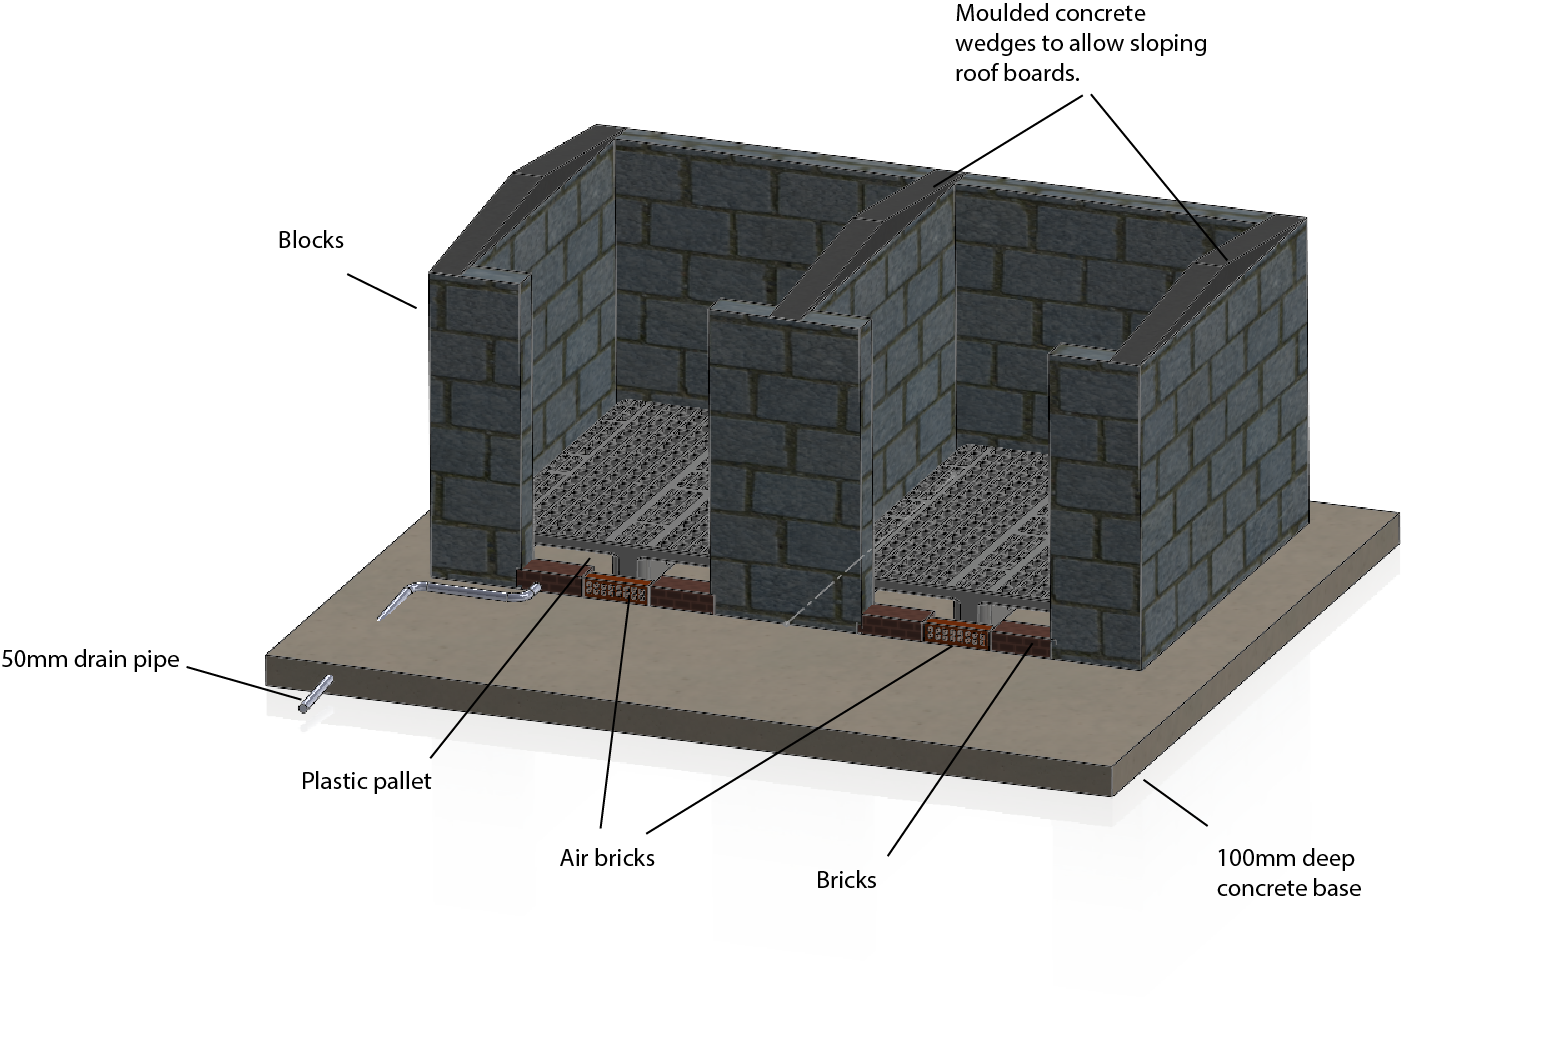
Get hold of the pallets first. They come in different sizes, and you need to know the size so that you can build the walls fairly close around them.
Build a concrete base, 100mm deep. Put a slight slope in the base so that the liquid drains to the end where you’re going to install the drain pipe. The base needs to be big enough so that your block walls aren’t sitting right on the edge of the base. Allow, say, 200mm of freestanding concrete outside of the walls. Embed a 50mm piece of drain pipe in the wet concrete. I also built the bed big enough so there was room to work in front of the bins, to get a wheelbarrow in place to help with the emptying.
When the concrete has set, put your pallets on top and draw around them with chalk. Leave a 30 - 50mm gap around the pallets, or they’ll be awkward to lift in and out. Leave enough space between the pallets for the central wall.
Then do your blockwork. Leave a gap at the bottom corners of the central wall so that liquid can drain easily through it between the chambers.
The roof area is bigger than you need when you’re filling in the bin. You only need to take the whole roof off when you’re emptying it. So I split the roof into two sections and put slopes on the back and front by creating wedges of cement on the tops of the blockwork. I made a simple mould and used it for all three wedges.

At the front of the blockwork, place one air brick by each bay and fill the rest of the space with plain bricks. This will allow enough air to get in under the pallet. The air will naturally flow upwards through the warm heap – flowing faster the hotter the heap gets and the more open the heap is. Don’t worry about how the air will escape from the top. Even if there’s just a millimeter gap between your roof sheets and the blockwork, taking into consideration the length of the edge to the roof, you’ll have as much room for the air to flow through as you have at the bottom through the air brick.
The plywood I used to make the front and the roof I stiffened by gluing and screwing on some 50 x 25mm roofing batten. I arranged the battens so no rainwater could puddle on the roof.
The fronts slide up and down on the inside of the blockwork. To keep the woodwork in place I used brackets something like this – something I just had to hand.
